Dual Mufflers

Home
HONDA XR XL MT MTX BACKGROUNDS
NOS XR XL CR Parts
XR & XL Seat Logo Stencils
Honda Backgrounds Decals
H3 Halogen Dual Filament 12v 35w/55w bulbs
XR250 Restoration
XR350 Restoration
Yamaha Backgrounds
Kawasaki Seat Covers Backgrounds
Gallery
Contact Me
USD Conversion
Swingarm Conversion
Engine Re-Paint
Dual Mufflers
New Parts Fitted
XR Tests and Honda Brochure
Links to other sites
Video clips.
My Location
About me
South Wales BSMA / Abergavenny AMCA Motorcross
Ozy

dscf5124copy.jpg

I decidied to do this muffler conversion simply as something different to do; I think it looks fine and there is a noticeable difference in power delivery not that I was looking for more speed! The acceleration from bottom to top end is more rapid; probably due to the less restriction in the mufflers so the gasses flow a lot quicker. It was necessary to richen the fuel mixture a tad.
 
The mufflers and linking pipe I bought off a chap who'd replaced his 2006 CRF250R system with a Pro-Circuit set up.
 
I no longer use the dual mufflers having gone back to the original muffler. The duals you have to repack every so often.
 
Click each picture to see a larger version.
 

crf250frontandmiddle.jpg

2006 CRF250R system.

dscf4611.jpg

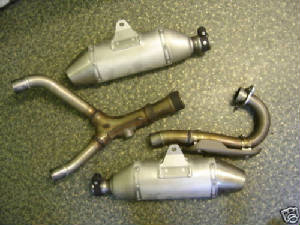
The newer style muffler above I'd bought brand new and decided not to cut it up and as I still had the old original 1985 muffler, I used that one. After measuring, I cut the front section off it (where it joins the header pipes) and cut the same length off the CRF250R linking pipe. After welding the bits together, some black heat paint and a couple of aluminium hangers for the mufflers to mount to the frame all that was left was to mount it and fire the old girl up.

dscf4612.jpg

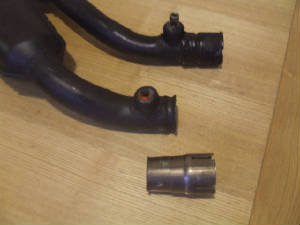
The piece I cut off the linking pipe to use as a guide for the amount to cut off the 1985 XR250 muffler.

dscf4597.jpg

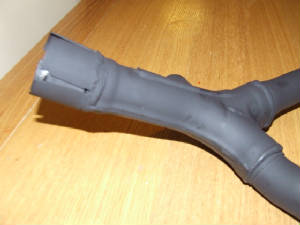
Linking pipe with 1985 section welded on and then painted.

dscf4599.jpg

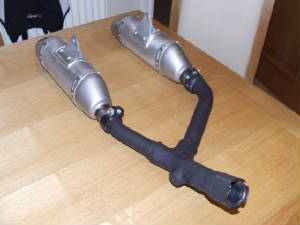
All done and ready to attach.

A couple of weeks later I replaced the packing in the mufflers. To do this you only need to drill out the rivets at the linking pipe end of the mufflers. Then using a plumbers blow-torch, heat up the area around the rivets you took out and using a twist/pull motion remove the muffler casing.

dscf5043.jpg

dscf5045.jpg

Here you can see the sealer that you'd be heating up.

dscf5050.jpg

dscf5049.jpg

dscf5047.jpg

View looking towards the exit end of the muffler.

dscf5051.jpg

The new muffler packing. In total there's 3 sections for each muffler.


Web Analytics

Clicky